kya aapaka bhee phon chaarjing samay garam ho jaata hai


kya aapaka bhee phon chaarjing samay garam ho jaata hai


smaartaphon logon ke jeevan ka ek mahatvapoorn hissa ban gae hain, yahaan tak ​​ki ek doosare ke lie, koee khud se phon alag nahin karana chaahata hai, isalie hamen apane phon ke lie kuchh bhee karana chaahie. aksar, yah notis hota ki smaartaphon ka chaarj chaarj karane se shuroo hota hai, ab ham is samasya ko hal karane mein aapakee sahaayata karane ke lie kuchh yuktiyon ke saath aae hain.
praudyogikee mein tejee se badalaav ke kaaran, in dinon kampaniyaan apane smaartafon mein apanee pheechars de rahee hain, jo phon ke baad oto paavarap banatee hain, lekin abhee bhee kaee phonon mein ye suvidhaen nahin hain, isalie sabase bada savaal yah hai ki kya karana hai smaart fon upayogakarta khade hote hain
1) hamesha ek baat yaad rakhen jo aapake smaartaphon ko keval mool chaarjar ke saath chaarj kar raha hai, dupliket chaarjar ka upayog karake phon ke svaasthy ke lie haanikaarak saabit ho sakata hai. aisa karane se bachen
2) vaise, phon chaarj karane ka upayog nahin kiya jaana chaahie, agar aap apane phon ka upayog nahin kar rahe hain, to phon ko havaee jahaaj mod mein daalane kee koshish karen, aisa karake, phon tejee se deta chaarj kar raha hai yah bhee bachaata hai. itana hee nahin, phon band ka chaarj bhee jaldee se chaarj kiya jaata hai
speed ke maamale mein, yah saimasang ka phlip smaartafon hoga, yah pheechars ho sakata hai
3) jab bhee aap apane smaartaphon ko chaarj karate hain, ek baat par nazar rakhen aur chaarj karane ke dauraan apane phon ko baitaree sevar mod mein rakhen, aisa karane se smaartaphon ka baitaree jeevan badh jaata hai

How to convert image to pdf file

Hello frnds welcome to hitech aj
 Dosto  aaj mai apko batane wala hun ki kaise aap aapne image ya photo ko pdf me change kar sakte hai or us pdf file ko kahi par bhi raka sakte
To iskeliye aapko playstore me jana hoga aur search karna hai image to pdf converter


Aur download hone ke baad open kare
Isme + ka sine hoga use click kare

Click karne ke baad gallary open hoga
Usme se image select kare aur done pe clock kar de

Done kare ne ke baad ek pdf ka sine rahega uper me use select kare

Select hone ke baad  usme pdf ka name puchhega ki aap kya name rakhana chahte hai  name fill kar ke  ok click kijiye

Ok click karne ke baad kuch second lagega aapka pdf banane me 


useke baad aapka pdf ready hai use keliye 


For more information watch my video  and search my channel on youtube

My channel name:- hitech aj


How to edit blog html in android mobile

Chanakya policy may have to be reversed by believing above these 5 people!

Chanakya policy may have to be reversed by believing above these 5 people!


These five people may have to repent over age by believing in Chanakya policy - Chanakya has said in his policy that never believe in these 5. Whoever believes in them.


Chanakya policy may have to be reversed by believing above these 5 people!


He can be surrounded by some horrible disaster. These five should always work only by being careful. Let's know who is the five who should never believe.

Chanakya policy may have to be reversed by believing above these 5 people!


● The first is the river. Acharya Chanakya says in his policy that it is appropriate to live in a place where there is a river but never believe that river. People living near the river should always be alert. As soon as the notice of deception should be removed from this place. If you believe in the river and stay at that place then due to flooding your life may be harmed or your property may also be damaged. Therefore, never believe in the river. If you live near a place near the river, always be alert.

● Second is the weapon We must always be careful with such a person, who has arms in his hands and also holds arms near himself. Because if you have a fickle quarrel on that day, then the person can become angry and use that weapon on you. Because when a person gets angry, the ideological power of the person decreases and that person can take any action inadvertently knowingly. Therefore such a person should never believe and should always stay away from them.

● The third is the animal of the animal, which means animal or animal, which has nails or horns. According to Chanakya, we should never believe in animal or violent creature that has horns or nails because it can harm the violent creature and at such times also life may be a problem. Therefore, be careful of any pointed nail or horny animal.

● The fourth is a wicked woman who is innocent Chanakya says that the innocent woman who is wicked thoughts should never believe in it. He can deceive you by leaving his job and showing you his innocence and he can trap you in big trouble. So do not believe in a woman who is innocent.

● The fifth is the people of the royal house. Chanakya says people of the royal family should not believe in anytime. He can trap you with sweet things. You can also use. He can also lure you with anything and misbehave with you. The people of the royal house have possessions and people listen to their own things.

If you have been betrayed, then you will not be able to ask for help against anyone because people will not trust you at that time. So always stay away from the people of the royal family.

Learn how much good a good mobile network is for your mobile.

Learn how much good a good mobile network is for your mobile.


Friends, all of you will know how important it is for you to have a good mobile network, but do you know how bad a mobile network is harmful for your mobile and how good a good network would be for your mobile So, we are going to tell you today about some of the benefits of a good mobile network.


First of all, we tell you that a good mobile network helps save your mobile battery and protects you from the hassle of charging the battery repeatedly.

Learn how much good a good mobile network is for your mobile.

The second fayadera better network is that it also protects your mobile phone from being hot, so that there is no harm to your mobile processor and it remains cold.

And the third largest fayeda is that you provide fast access to the internet and also saves your precious time.

How to create a channel on youtube and earn money

How to create a channel on youtube and earn money 


Do you also want to have your own channel on YouTube? You also want to be able to post videos on youtube like others, so that more people can see them? So today we will tell you the way you can create your own YouTube channel. The special thing is that making your YouTube account and channel is very easy. You have to follow a few steps for this.

To begin a YouTube channel, you must first have an active Google Account. If you do not have a Google Account, then first create a Google Account. You can start the process of making a YouTube channel after you sign in to Google Account on YouTube.                                      

Create channel on youtube
First, go to YouTube and click on the thumbnail image of your YouTube account at the top of the right-hand corner. Clicking on this will open a drop-down tab, now go to the gear icon given to 'Creator Studio' for YouTube settings in this tab. Select this button for the YouTube setting gear icon.

After clicking on this gear icon, you will be redirected to the Account Settings page where you can select the 'Create A channel' option.

Now, a new dialing box will open where you must enter the name of the YouTube channel. For the name of the YouTube channel you can choose the first and last letter of your name or any other (Richmond) name. It is best that you choose a name to make it clear that your YouTube channel is related to. Once you have selected the name, you have to select the category. After doing so, you have to click on the dialog box to agree on page terms. Now click on the 'Done' below. (Carefully read the terms and conditions before clicking on the check box)


After doing so, you have now officially created a YouTube channel. You will now be redirected to a new page where you can insert photos related to your brand, background art, channel icon. Keep in mind that you are logged in on your YouTube channel. If you are not on your YouTube channel, then click the Account Profile icon at the top right corner of the site and click on your new YouTube page from the drop down option.


You can select the pen icon to change the profile image in the YouTube channel, which looks when the cursor moves to the default profile image. It is worth noting that the icon of your Youtube channel is also connected to your Google Plus page. That's why this change will appear on both pages and it may take some time to appear.

For channel background, you can select from the 'Ad Channel Art' tab. Even if you do not have a picture of the necessity at the moment, it does not matter because YouTube has a gallery available for background image.

Now, you can put fun and attractive explanations about your new channel. Here you can share everything that shows what your YouTube channel is about and when you want to post the kind of content. Apart from this, you can also send an email to the business inquiries.

Now you can upload any video by selecting the option of video upload in your channel.


Keep this setting of YouTube account in mind
To make your YouTube account even better, click on the gear icon again. The gear icon will appear on the top of the right corner at the top of your account's profile image.

If you want to connect your channel to a social media site like Twitter, you can click on 'Connected Accounts'. From this, your Twitter profile will connect to the YouTube channel for social updates. You can get updates according to your preference by adjusting the settings.

Apart from this, by selecting 'Feed Settings on your channel', you can also manage the activity shared on the channel feed on your YouTube account. You also have the option to enable / disable the Channel Discussion Display. With this, you can also customize the layout of your YouTube channel.

To edit your channel's likes and subscriptions, go to the Account Settings menu and click on 'Privacy'.


FOR MORE INFORMATION WATCH THIS VIDEO


How to send Gmail to big files aprox 10 GB

Now send Gmail to 10 GB files


As increasing internet speed over time came to send that file to the e-mail is going to grow in such often do we have a lot of problems in sending files email large size and to seek other options.


But now because Gmail's biggest service provider, Gmail, is offering a service through Google Drive to send you email attachments of up to 10 GB and up to.

Yes but for this you need to use Gmail's new pop-up compose box, this new pop up com

Once you reach the new compose box, click on "+" in the toolbar below, you will see the new option of Insert File Using Drive


Something a bit like this.

By clicking on this button you can send up to a maximum of 10 GB of file by mail.
Note that the larger the file will take as much time to upload.

The next time you need to send a large file via email, you will not need to go somewhere other than Gmail.

How to recovery your memory card data

How to recovery your memory card data


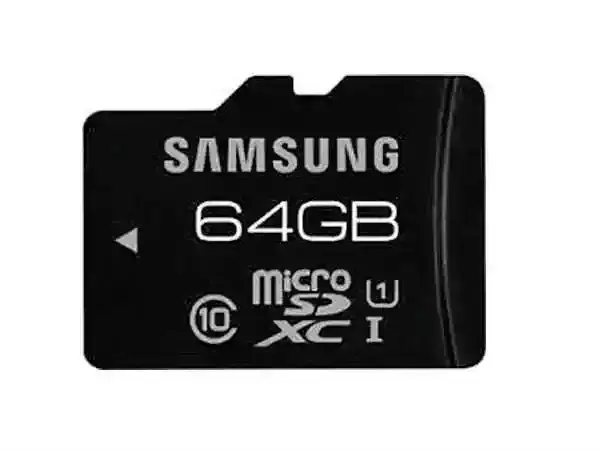
Technology today is a very smart phone. In the first camera used reel, you could have taken photos close to 30 at a time. Today the cameras come with the memory card, which allows you to store hundreds of photos according to memory card storage without printing it.
Memory card is used not only on cameras but in other devices such as smartphones. Only then can you store so many apps, music, videos, photos and other data in your phone. However smartphones also come with good storage capacity.

Think about all this, if everything is lost with your personal and important data memory card? So do not need to be bothered, you can get all the data back from this easy trick. Check the card with another device
The most common problem with memory card is that sometimes due to viruses, data does not show in the device. In this case, remove your SD card and put it in another device and check it.

View in Card Reader
You can also check the memory card card by putting it in the card reader. By going to Start, type 'cmd' into the search box. After the command window appears openly, follow the drive and type "chkdsk". After this, write the colon and / F Enter and you will get a solution to your problem. You can step-by-step according to the same and get a solution. If you have these smartphones then just go and get the Reliance live 4G SIM!
The drive checker does not assign a new drive to the SD card system, and shows that insert the disc into drive E. In order to solve this problem, this problem can be solved by assigning a new drive letter through its operating system setting.

Card property
One way to get back the data of the SD card is also to go to the property of the card drive and check the space. If the file is completely deleted, full space will be displayed in the SD card. Many times only the directories are deleted. In such a situation, you can use the SanDisk Inbuilt Solution, which can restore all deleted files. Check with the Disk Diagnostic Tool
If you are clear that your card has files but you are not able to save them then your card will be on a protected turn. In this case, you have to unlock all files on the card to save or change it. In such a situation, you will have to use the Disk Daggnistic Tool which works on the SD card. On the other hand, you can also use some methods of recovery software that will be able to restore the data of the SD card.

How to recovery your memory card data in hindi

टेक्नोलॉजी आज बेहद स्मार्टफोन चुकी है। पहले कैमरे में रील का प्रयोग हुआ करता था, तब आप एक बार में 30 के करीब ही फोटो खींच सकते थे। आज कैमरे मैमोरी कार्ड के साथ आते हैं, जिसकी मदद से आप मैमोरी कार्ड के स्टोरेज के हिसाब से सैंकड़ों तस्वीरें स्टोर कर सकते हैं वो बिना प्रिंट किए।
मैमोरी कार्ड केवल कैमरे ही नहीं बल्कि अन्य डिवाइस जैसे स्मार्टफोन में प्रयोग किया जाता है। तभी तो आपके फोन में इतनी सारी एप्स, म्यूजिक, विडियो, फोटो व अन्य डाटा स्टोर हो पाता है। हालांकि स्मार्टफोन भी अच्छी स्टोरेज क्षमता के साथ आते हैं।
इन सभी के बीच सोचिए आपके पर्सनल और जरुरी डाटा से भरे मैमोरी कार्ड से सबकुछ डिलीट हो जाए तो? तो परेशान होने की जरुरत नहीं है, आप इस आसान ट्रिक से सारा डाटा वापस पा सकते हैं।कार्ड को दूसरे डिवाइस के साथ चेक करें
मैमोरी कार्ड के साथ सबसे आम समस्या होती है कि कई बार वायरस आदि के कारण डाटा डिवाइस में शो नहीं करता है। ऐसे में अपने एसडी कार्ड को निकालकर दूसरी डिवाइस में लगाएं और चेक करें।
कार्ड रीडर में देखें
आप मैमोरी कार्ड कार्ड को कार्ड रीडर में लगाकर भी चेक कर सकते हैं। स्‍टार्ट पर जाकर, सर्च बॉक्‍स में 'cmd' टाइप करें। कमांड विंडो खुलकर सामने आने के बाद, ड्राइव को फॉलो करते हुए "chkdsk" को टाइप करें। इसके बाद कोलन और /एफ लिखें। एंटर कर दें और आपको आपकी समस्‍या का समाधान मिल जाएगा। आप उसी के हिसाब से स्‍टेप-दर-स्‍टेप करें और सल्‍यूशन पाएं। अगर आपके पास हैं ये स्मार्टफोन तो अभी जाकर ले आएं रिलायंस जियो 4जी सिम!
ड्राइव चेककई बार सिस्‍टम, एसडी कार्ड के लिए एक नई ड्राइव को एसाइन नहीं करती है और शो करती है कि ड्राइव ई में डिस्‍क को लगाएं। ऐसे में इस समस्‍या के समाधान के लिए, अपने ऑपरेटिंग सिस्‍टम सेटिंग के माध्‍यम से न्‍यू ड्राइव लेटर को एसाइन करके इस प्रॉब्‍लम को सॉल्‍व किया जा सकता है।
कार्ड प्रॉपर्टी
एसडी कार्ड के डेटा को वापस पाने का एक तरीका यह भी है कि आप, कार्ड ड्राइव की प्रॉपर्टी में जाएं और स्‍पेस को चेक करें। फाइल पूरी तरह से डिलीट होने पर एसडी कार्ड में फुल स्‍पेस दिखाई देगा। कई बार सिर्फ डायरेक्‍ट्री ही डिलीट होती हैं। ऐसी स्थिति में, आप सैनडिस्‍क इनबिल्‍ट सल्‍यूशन का इस्‍तेमाल कर सकते हैं जो कि डिलीट हुई सारी फाइल्‍स को रिस्‍टोर कर सकता है।डिस्‍क डायग्‍नोस्टिक टूल के साथ चेक करें
अगर आपको साफ दिख रहा है कि आपके कार्ड में फाइल्‍स हैं लेकिन आप उन्‍हें सेव नहीं कर पा रहे हैं तो आपका कार्ड, प्रोटेक्‍टेड मोड़ पर होगा। ऐसे में आपको कार्ड पर सभी फाइल्‍स को सेव या बदलने के लिए के लिए उसे अनलॉक करना होगा। ऐसी स्थिति में, आपको डिस्‍क डाग्‍नोस्टिक टूल का इस्‍तेमाल करना होगा जो कि एसडी कार्ड पर काम करता है। वहीं दूसरी ओर, आप कुछ तरीके के रिकवरी सॉफ्टवेयर का भी इस्‍तेमाल कर सकते हैं जो कि एसडी कार्ड के डेटा को पुन: स्‍टोर कर पाएंगे। thanks for all  Of you

How to transfer data without Bluetooth and usb in computer

How to transfer data without Bluetooth and usb in computer


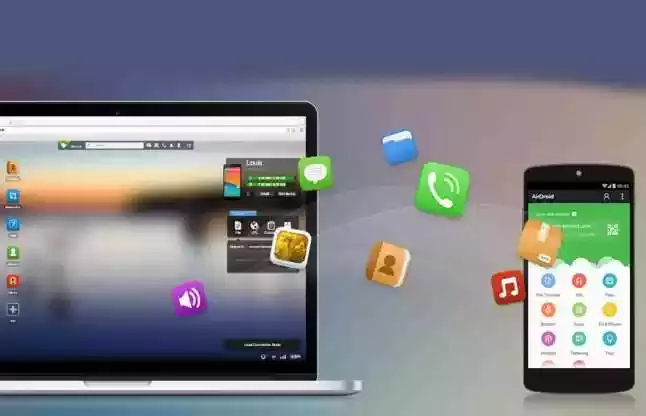
Users use mediums like data cable and Wi-Fi to transfer data from a smartphone to a computer. But while using these methods, sometimes there is a hassle, such as not getting connected properly to Wi-Fi. That's why we are telling you about an app through which you can do this work in a few minutes. The name of this app is "AirDroid".
Transfer data from a smartphone into a computer
- Download and install AirDroid app from Google Play Store in the first smartphone.
Now open this app and click on SIGN IN or SIGN UP.
After that you will see the option of SIGN UP on the bottom right. Click on it.
Here you have to enter your e-mail ID, password and nickname. Then click on SIGN UP.
After this you will receive a message that will be asked if you want to see the phone's app and system notifications on the computer? If yes, then enable it.
-After that you have to open www.airdroid.com on your computer. Here you will have the option of downloading upwards. Click on this to download the app.
Then click on your smartphone file transfer option. This app will scan your computer, after which you will be able to transfer the file.
- When you open this app on your computer, you will see your phone's name on the left hand side of the screen.
Then click on file transfer in the phone. You will have a screen in which two options will be provided with an AirDroid Web and AirDroid Desktop
-You have to click on AirDroid Desktop. Here you will see options at the bottom. From here you can select photos, videos accordingly.
After this, through this app, you will be able to transfer your data from a smartphone to a computer within a few minutes. Tell you that you can also use AirDroid without downloading the app on the computer. You have to go to http://web.airdroid.com/ for this. Here you will see the QR Code. You have to scan it with your phone. After this AirDroid will open in your computer.

How to transfer data without Bluetooth and usb in computer in hindi

बिना ब्लूटूथ और यूएसबी के ऐसे करें मोबाइल से कम्प्यूटर में डाटा ट्रांसफर

 यूजर्स स्मार्टफोन से कम्प्यूटर में डाटा ट्रांसफर करने के लिए डाटा केबल और वाइ-फाइ जैसे माध्यमों का इस्तेमाल करते हैं। लेकिन इन तरीकों का इस्तेमाल करते हुए भी कभी-कभी परेशानी का सामना करना पड़ता है, जैसे वाई-फाई का ठीक से कनेक्ट न हो पाना आदि। इसीलिए हम आपको बता रहे हैं एक ऐसे एप के बारे में जिसके जरिए आप चंद मिनटों में ही यह काम कर सकते हैं। इस एप का नाम “AirDroid” है।
स्मार्टफोन से कम्प्यूटर में डाटा ऐसे करें ट्रांसफर
—सबसे पहले स्मार्टफोन में गूगल प्ले स्टोर से AirDroid एप डाउनलोड करके इंस्टॉल करें।
—अब इस एप को ओपन कर SIGN IN OR SIGN UP पर क्लिक करें।
—इसके बाद आपको दायीं ओर नीचे SIGN UP का ऑप्शन दिखेगा। इस पर क्लिक करें।
—यहां आपको अपनी ई-मेल आईडी, पासवर्ड और निकनेम डालना होगा। इसके बाद SIGN UP पर क्लिक करें।
—इसके बाद आपके एक मैसेज आएगा जिसमें पूछा जाएगा कि क्या आप फोन की एप और सिस्टम नोटिफिकेशन को कम्प्यूटर पर देखना चाहते हैं? अगर हां तो इसे Enable कर दें।
—इसके बाद आपको अपने कम्प्यूटर पर www.airdroid.com ओपन करना है। यहां आपको ऊपर की तरफ डाउनलोड का ऑप्शन दिया गया होगा। इस पर क्लिक करके एप को डाउनलोड करें।
—उसके बाद अपने स्मार्टफोन फाइल ट्रांसफर के ऑप्शन पर क्लिक करें। ये एप आपके कम्प्यूटर को स्कैन करेगा, जिसके बाद आप फाइल ट्रांसफर कर पाएंगे।
—जब आप अपने कम्प्यूटर पर ये एप ओपन करेंगे तो आपको स्क्रीन पर बायीं ओर अपने फोन का नाम दिखाई देगा।
—इसके बाद फोन में फाइल ट्रांसफर पर क्लिक करें। आपके सामने एक स्क्रीन आएगी जिसमें दो ऑप्शन दिए गए होंगे एक AirDroid Web और AirDroid Desktop
—आपको AirDroid Desktop पर क्लिक करना है। यहां नीचे की तरफ आपको ऑप्शन्स दिखाई देंगे। यहां से आप अपने मुताबिक फोटो, वीडियो सेलेक्ट कर सकते हैं।
इसके बाद इस एप के जरिए आप चंद मिनटों में ही अपना डाटा स्मार्टफोन से कम्प्यूटर में ट्रांसफर कर सकेंगे। आपको बता दें कि आप कम्प्यूटर पर बिना एप डाउनलोड किए भी AirDroid इस्तेमाल कर सकते हैं। इसके लिए आपको http://web.airdroid.com/ पर जाना होगा। यहां आपको QR Code दिखाई देगा। इसे आपको अपने फोन से स्कैन करना है। इसके बाद आपके कम्प्यूटर में AirDroid ओपन हो जाएगा।

Share your battery charging any time any where

Share your battery charging any time any where

Easy transfer battery charge from one phone to another
High Grade Silicon Covering to provide sturdiness and a smooth touch
 Integrated Protective Circuit to ensures no overcharging or discharging
Power can be transferred from a smartphone/tablet with OTG functionality to ANY smartphone
Input/Output Current/Voltage: Adjusted as per the phone
Protected IC to ensure no overcharge/short circuit
Specifications
Size : 5.5cmx 2.5cmx 0.5cm
Weight : 0.05
Customisation : No

अब खुद बनाए अपने मोबाइल का चार्जर

अब खुद बनाए अपने मोबाइल का चार्जर
आज की भागदौड़ भरी जिंदगी में मोबाइल की चार्जिंग का बहुत ज्‍यादा प्रॉब्‍लम होता है। आजकल मोबाइल का इतना ज्‍यादा इस्‍तेमाल होता है कि इसकी बैटरी को बार-बार चार्ज करना पड़ता है। अब कई बार तो हमारे सामने बिजली गुल की समस्‍या भी आ जाती है जिसकी पजह से फोन चार्ज करना असंभव हो ताता है। आपको इसी मुश्‍किल से बाहर निकालने के लिए हम आपको बताते है एक ऐसे पोर्टेब्‍ल चार्जर के बारे जिसको आप खुद बना पाएंगे। इस चार्जर की खास बात तो ये है कि इस चार्जर को मोबाइल चार्ज करने के लिए बिजली की भी जरूरत नहीं है।
इन पार्ट्स की है जरूरत
इस पोर्टेब्‍ल चार्जर को बनाने के लिए आपको जिन पार्ट्स की जरूरत पडे़गी उसकी लिस्‍ट इस प्रकार है-
1. USB फीमेल कनेक्टर
2. वोल्टेज रेगुलेटर IC - 7805
3. 5mm रेड LED
4. 404 ohms रजिस्टर
5. 9 वोल्ट बैचरी और कनेक्टर
6. 2 बॉटल की ढक्कन
इन सभी पार्ट्स के साथ-साथ आपको चिपकाने के लिए ग्लू, शोल्डरिंग आयरन, 3 छोटे वायर और वायर कटर की भी जरूरत पड़ेगी।
ऐसे बनाएं चार्जर
चार्जर बनाने के लिए सबसे पहले बॉटल का एक ढक्कन ले लिजिए और उसमें गर्म शोल्डरिंग आयरन से एक बड़ा छेद कर दिजिए। छेद इतना बड़ा होना चाहिए कि उसमें फीमेल कनेक्टन आराम से फिट हो सके। कनेक्टर को बाहर और पिन को ढक्कन के अंदर की तरफ रख के इसे ढक्कन में फिट करें और फिर उसको अच्छे से ग्लू से चिपका दें। अब 2 छोटे कटे वायर ले लिजिए जिसमें एक वायर ब्लैक और एक रेड होना चाहिए। शोल्डरिंग आयरन से रेड वायर को पिन 1 और ब्लैक वायर को पिन 4 से कनेक्ट करे दें। अब बॉटल के दूसरे ढक्कन को लें और शोल्डरिंग आयरन से उसमें भी एक छेद कर दें। इसके बाद कनेक्टर लें और उसमें लगे दोनों वायर को ढक्कन के छेद से अंदर की तरफ डालें। अब वोल्टेज रेगुलेटर IC लें। इसके पिन को काट कर छोटा कर दें और शोल्डरिंग आयरन से कनेक्टर के एक वायर को रेगुलेटर IC के पहले पिन से जोड़ें और दूसरे वायर को दूसरे पिन से जोड़ दें।
फिमेल कनेक्‍टर का दोबारा से यूज
अब USB फीमेल Connector में लगे ब्लैक वायर को रेगुलेटर IC से जुड़े ब्लैक वायर से जोड़ दें। इसके बाद USB फीमेल Connector में लगे रेड वायर को रेगुलेटर IC के तीसरे पिन से जोड़ दें। इस काम को अंजाम देने के लिए सोल्डरिंग आयरन का इस्‍तेमान करें। इन स्‍टेप्‍स को फॉलो करने के बाद आपको 407 Ohms रजिस्टर का यूज पड़ेगा। दोनों तरफ से इसके तार को काट कर छोटा कर दें। इसके बाद एक तार को रेगुलेटर IC के फर्स्ट पिन से जोड़ें (जिससे कनेक्टर का रेड वायर जुड़ा हुआ है।) औ दूसरे तार को रेड LED के एक तार से जोड़ दें। इसके बाद आप एक और ब्‍लैक वायर का इस्‍तेमाल करे और इसके एक छोर को रेड LED से कनेक्‍ट कर दें और दूसरे को IC के बीच वाले पिन से।
सबको साथ चिपका दें
अब आपके द्वारा किए गए सभी कनेक्‍शन को ग्‍लू की मदद से चिपका कर मजबूत कर दें। आप वोल्टेज रेगुलेटर IC को ग्लू से ढक्कन के अंदर चिपका दें। एक ढक्कन में शोल्डरिंग आयरन से छोटा छेद करके रेड LED फिट कर दें। इसके बाद दोनों ढक्कनों को आपस में चिपका दें और फिर कनेक्टर को ढक्कन के ऊपर चिपका दें। फाइनेली अब आप 9 वोल्ट की एक बैटरी और USB लें। इस USB को अपने मोबाइल फोन से और USB फीमेल कनेक्ट से कनेक्ट कर दें और फिर 9 वोल्ट बैटरी को ढक्कन पर चिपके कनेक्टर से कनेक्ट करें। ऐसे ही कुछ स्‍टेप्‍स को फॉलों करके आप अपने फोन को आसानी से चार्ज कर पाएंगे। इस चार्जर को आप कहीं भी ले जा सकते हैं और बिना इलेक्‍ट्रिसिटी के यूज से अपने फोन को चार्ज कर सकते हैं।

How to recovery Hard Drive tips


Hard Drive Recovery Tips


Let's dispense with the I-told-you-sos. If you find yourself facing a hard drive data recovery job, then you have probably forgotten the cardinal rule of computing: All hard drives eventually fail. And you didn't back up your data, did you? We've been there—hey, everybody has to learn this lesson once. Now what?
Panic!
Just kidding. Actually, the first thing to do is determine if it really is a hard-drive failure you're confronting, and not one of the countless other equipment glitches that can cause a boot failure. If you have access to another computer, remove the failed hard drive from your sick PC, and hook it up as a secondary drive to the alternate computer. The easiest way to do this is through a USB universal drive adapter—it costs about $30 and is a good device to have around for all sorts of hard-drive diagnostics.
On a Mac, the process is a bit simpler. Use a FireWire cable to hook your nonworking Mac to a working Mac, then, "target boot" the nonworking machine by holding down the T key as you power it on. With either method, it's possible that your failed hard drive will show up on your healthy computer and reveal its files, in which case your hard drive is probably fine, but your operating system needs to be reinstalled. (Don't forget to offload your files before you do that.
If your files don't show up on the secondary computer, then you are at one of those pivotal moments in life when you find out how much your hard work and treasured memories are really worth to you. Depending on how your drive is damaged, an attempt to salvage your data can cost anywhere from a hundred dollars to several thousand. What's more, the process can take days—and there is no guarantee that the money and time you invest will produce any results whatsoever.
Now that we've gone through the depressing task of properly setting your expectations, here's the good news: Very often, the data on failed drives is recoverable. In fact, it's surprising how resilient that information can be—just ask any corporate embezzler who thought he had deleted all the evidence from his PC, only to have it show up later in court. The comparison is apt, since the very same computer forensic tools that uncover digital misdeeds are the ones that can find your treasured family photos.
There are two ways that drives crash: Logical failure and mechanical failure. In a logical failure, the drive's components are physically undamaged, but because of either accidental formatting or a corrupt file system, the drive is not able to find and navigate its own data. However, unless it has been overwritten, that data still exists on your drive.
A mechanical failure means that your drive has broken parts that are preventing it from working—busted drives often make a telltale clicking sound as they futilely attempt to access their files. If you hear that, your data may still be there, but you're not getting it back without calling in the experts (see "Worst-Case Scenario," next page). And those experts make good money. Data recovery services from Kroll Ontrack, Seagate's i365 and Iomega charge between $500 and $2500 to attempt to salvage data from either logical or mechanical disasters, depending on the severity of the situation. But if you are just dealing with a logical failure, you can get your files back on your own for far less.
We recently attempted a data recovery from the crashed drive of a Popular Mechanics colleague whose 120 GB MacBook drive had spontaneously given up the ghost. We removed the drive from her laptop, then used our USB drive adapter to hook it up to a desktop computer for diagnosis. We didn't hear any sounds that indicated a truly dead drive, so our first step was to download the free demo diagnostic tool at Prosoft Engineering to check what might be salvageable. Many companies offer demos that will scan your drive and give you a pretty good idea of what's recoverable before you lay down money to buy their software.
Once the assessment indicated we'd get good results, we used Prosoft's Data Rescue II software ($99), which is tailored for the Mac OS and Mac-formatted drives. There are far more options for PC owners, including Prosoft's Data Rescue PC ($99), as well as Ontrack EasyRecovery DataRecovery ($199) and RecoverMyFiles ($60) from GetData.
Most of these products work in a similar way. Install the software, select the defective drive as your source and choose a destination folder to receive the data. (Make sure your recovery drive has enough space for the contents of your failed drive.) Then be prepared to wait, and wait. A full scan and recovery of our 120 GB drive took four days, and a larger drive could take longer.
Recovering a hard drive is a bit like getting back a stolen car—you'll be happy to have your files back, but the results could be messy. No data recovery program will return your files to you in exactly the condition you originally kept them. These programs are designed to essentially do a data dump from your problem drive to a new drive. Files will be organized by type (JPEG images will be in one folder, Word documents in some other folder, MPEG movies in another) and your songs and photos will be mixed with random sound and image files from your computer's system folder.
Additionally, the names of all your files will have been changed to various alphanumeric sequences, such as IMG1039.jpg or MOV2010.mov. So be prepared to settle in for a long weekend of sifting through and renaming your files. Oh, and while you're at it, now's a good time to buy that backup drive.
DRIVE DISASTERS: WORST-CASE SCENARIO
What if your hard drive is suffering from something a bit worse than your everyday hard-drive crash? How much damage can your data take before it's gone forever? We wanted to find out what could be salvaged from a computer that had been through a natural disaster, so we simulated a really bad one. We decided upon an earthquake/flood doomsday scenario. First, we took two laptop drives, loaded them with test movie and music files, then beat the heck out of them until we heard the signature clicking of mechanical hard-drive failure. Then we submerged one of the drives in custom- made storm-surge floodwaters (salt water, construction debris, oil) and let it soak for four days.
We sent both hard drives to Kroll Ontrack Data Recovery, which sells data-rescue services to both corporate clients and consumers. Ontrack's Jeff Pederson analyzed the drives in the company's clean room and found that the read/write heads in our dry drive were bent from our abuse and that we had scratched the platters. Our flooded drive was wet, but the platters were undamaged. Pederson replaced the heads and performed a recovery.
The results? Pederson was able to save 99 percent of the data from the dry drive and 100 percent from the flooded drive

How to paid electricity bill from paytm. and get cash back

aap apne mabile, pc se  electricity bill paid kar sakte hai  aur chash bhi le sakte iske liye aap paytm par login ho jaye aur paid kare

Search